Feeds:
Posts
Comments

Archive for the ‘gifts’ Category

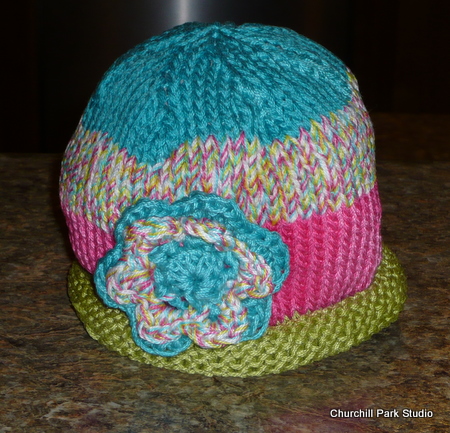
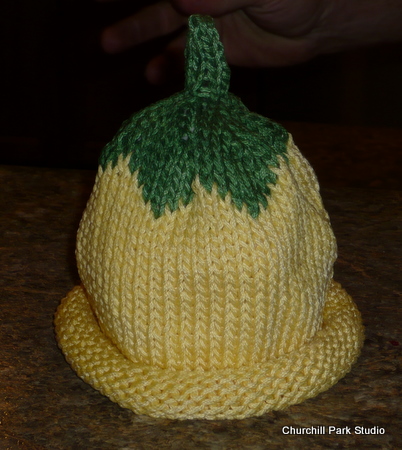
Knitting is not my main hobby, but sometimes it can be a very relaxing way to spend time. My dil was hoping for some cute hats for Everley.  Thus far, the only hat I have knitted for her was the preemie hat she wore in the hospital.  So, while I was visiting I managed to make a few. I took my huge bag of cotton yarns with me, along with my travel tin of knitting essentials.  Here are a couple of new ones I made last week.  That is my son’s hand hello-ing me in the picture.  He told me to re-take the photo, but I-with my infinite wisdom, was convinced I took the picture before he stuck his hand in there!

For this hat, I used the measurements between a preemie hat and a newborn.  The preemie size called for 45 stitches ( for a 5 – 7 lb. baby) and the newborn was 64.  I compromised and used 56.  This head chart I found online was very helpful. Once you are on the page, look under General Hats and then click on head size chart.  You will be able to download a very useful chart.   Everley is over 6 pounds now…so that is how I determined my cast on stitches.  I had my computer with me in Georgia, but not all my knitting patterns, so I googled a bit and came up with this pattern which I was able to use for the green leaves at the top.

Here is another hat, which I made into a newborn size so that Evie might be able to use it into the late summer/early fall.  I did not have any instructions for a flower of any kind and found this one along with crochet directions for a .

They are both sitting on the kitchen counter where I used a spray bottle filled with water to mist the cotton.  They are both stuffed with paper towels to help keep their shape.  Evie seems to have lots of pink clothes, so I thought this color combo could be useful. 

I also finished knitting an upside down daisy hat, but I left it with Kim to finish.  I don’t know why, but I hate -hate -detest -lothe…hand sewing knitted things.  I can’t stand to weave in all those ends (like this hat above…color changes…flowers…UGH!)  Kim was happy to have the hat, so she offered to do those tedious tasks as long as I did the knitting.  I was very happy.  If she finishes it and sends a picture, I will post it.

Thanks for visiting,
Read Full Post »

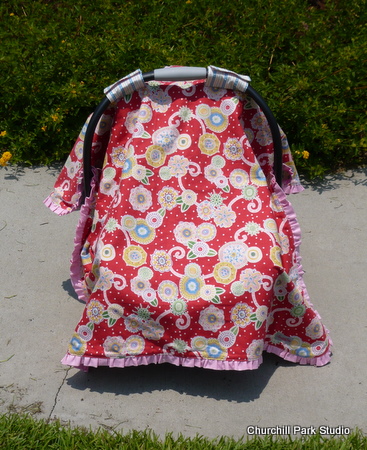
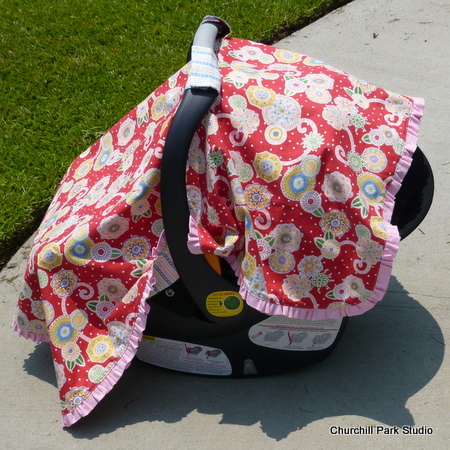
I have a few more projects to share.  This spring I made 2 car canopies.  One was for my niece Jessica and the other was for my dil Kim and baby Everley.  I chose to use fabric I had in my stash rather than purchasing something new since my stash is pretty big and I have lots of fun fabrics.  First,  I had to make sure that the handles for the car seats were straight across.  Some of the new car seats have handles that have a perpendicular section of the handle in order to have the baby face into the person carrying the car seat.  This would mean that you have adjust the tabs for the handle by 6 inches or so.  Both girls had chosen car seats with straight handles so I was good to go.

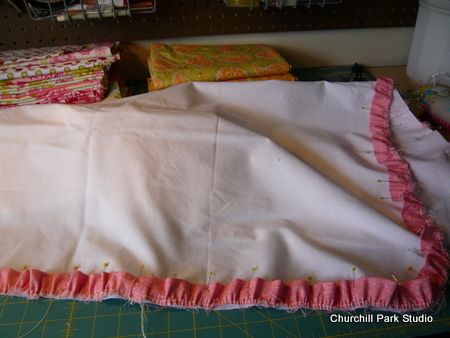
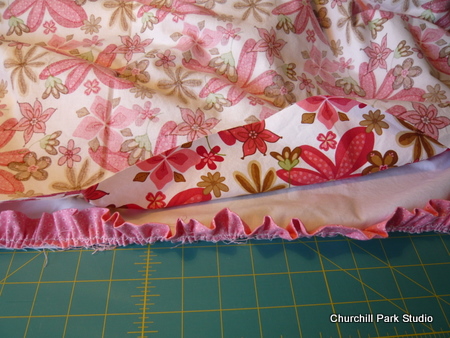
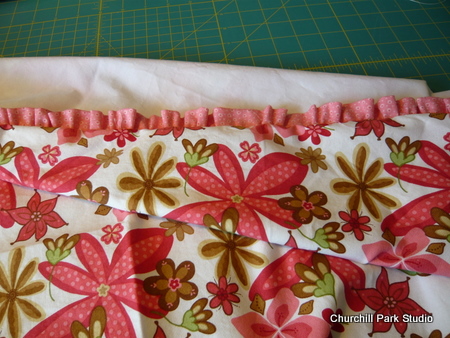
I spent some time searching for tutorials online and so many were nice and had pictures…but I was trying to sew without the benefit of a physical seat to look at and measure.  The majority of the tutorials I found did not include measurements.  I did find one that used a ruffle and I liked the idea because both girls have baby girls and the ruffle is a bit feminine.  I also chose to line both canopies because once I decided to use a ruffle -I wanted  raw edge  of the ruffle covered between the two layers.  This is the tutorial I used the most.  Also, I just found a pattern for a car canopy by Elizabeth Wyatt which has a bustle in the back for ventilation (a good idea!) and a zipper in the front so that you can open the canopy…not sure that is essential  but some may find it very handy.  Here are my pictures:

The original tutorial I started with instructed you to use 1 yard of fabric, which resulted in a short canopy.  These two work fine as long as the hood of the car seat is raised.  I found tutorials after I cut the fabric that listed 1 and 1/3 yards of fabric.  If I make more of these, I will use the 1 1/3.

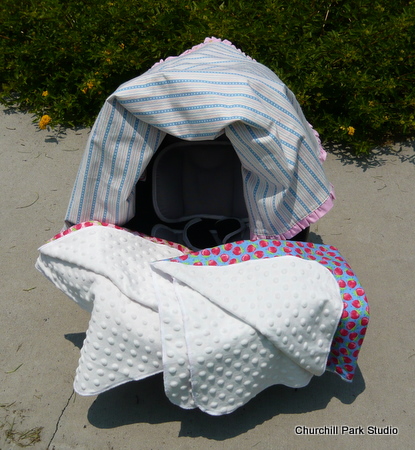
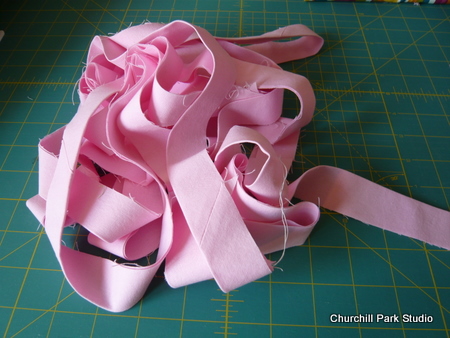
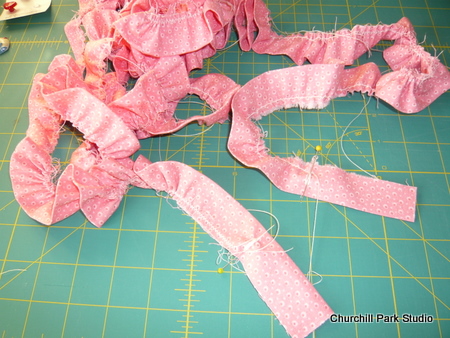
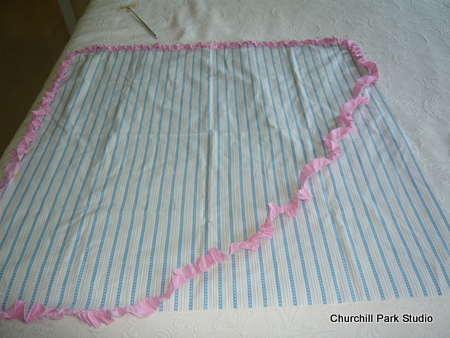
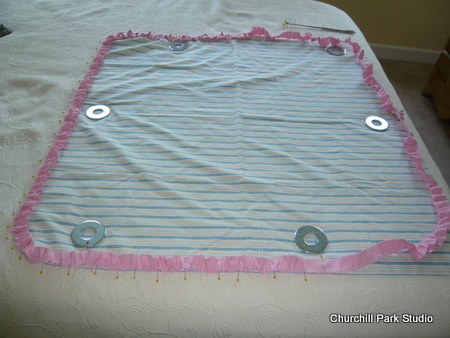
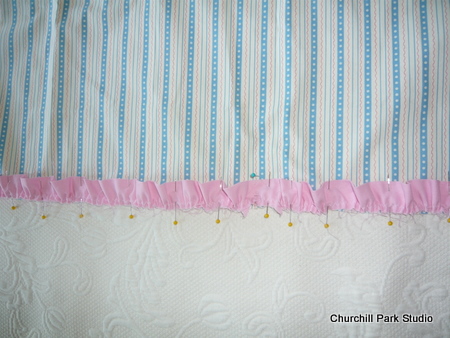
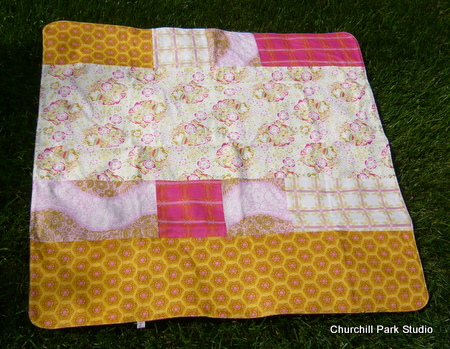
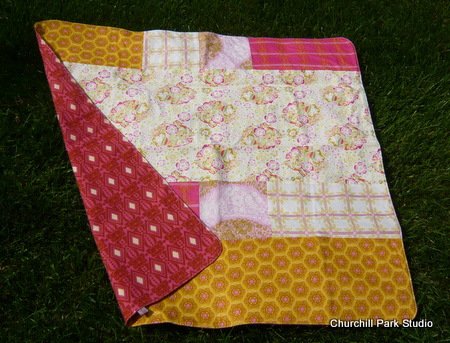
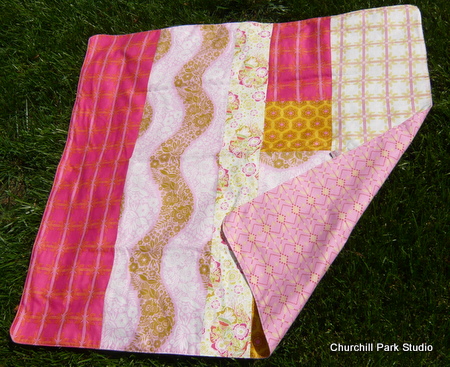
I also included a couple of travel blankets which coordinate with the fabric of the canopy.  The reverse side is made with a minkie type fabric.  I simply serged the edges together.  Very fast and simple.  My daughter has a couple of these I made for her and said that they come in handy when it is getting close to nap time and the girls are stuck in the car.  Here are a few additional pictures of the process.  The ruffle seemed to be the most time-consuming part of these projects.   I used my washer weights to mark the seams of the ruffle in order to help distribute the ruffle evenly.  Some of these pictures are Jessica’s canopy for baby Illeana.

Here are a few additional tutorials I have found since making mine.  One has a window built into the front which is handier than a zipper.  This one uses buttons to decorate the handles and has a good pictures and measurements.
Thanks for visiting,

Read Full Post »

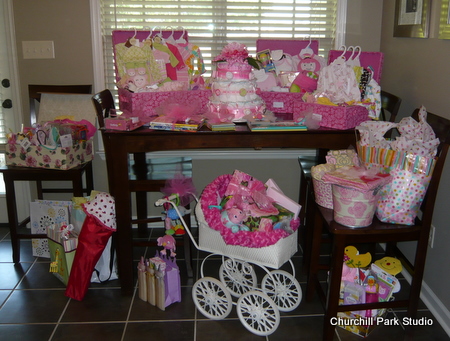
When my husband and I visited GA, along with Kim’s mom, we took as many gifts as we could and tried to make the dining area look fun, girly and exciting.  Here is the result:

The little buggy was actually Kim’s when she was a girl.  Her mom has been saving it all these years.  Doesn’t it look so cute!

One of the downsides to blogging is that if your project is a surprise…you really can’t blog about it until the person receives it.  So here are some of the other projects I have been working on…I also made a set of burpies that match her Amy Butler nursery. Maybe you remember these pictures from a previous post.

Kim ordered her dust ruffle, crib sheet and bumpers from an Etsy seller, but she had only one crib sheet. So, I made her 2 more in her coordinating colors. I used this tutorial and knew it would work because I had made several vintage looking crib sheets for my daughter. I like the elastic all the way around, but it is tedious running it through with a safety pin!!

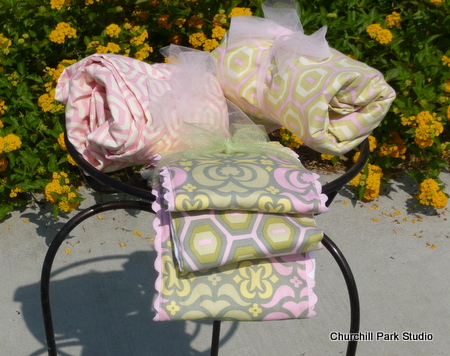
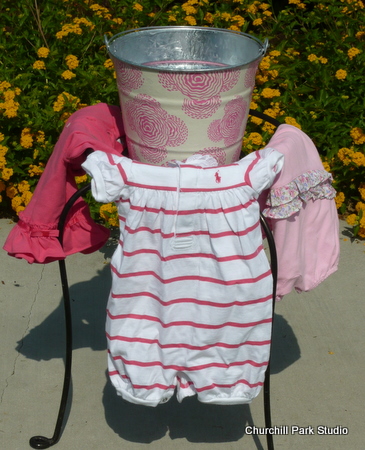
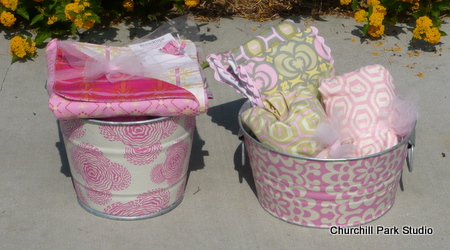
I also made a couple of coordinating galvanized buckets for Kim to stash some stuff (diapers, lotions, whatever). They are also coated with a water-proof finish so she could use them in the bathroom if she chooses.   One of them was filled with the only gifts I did not make…Ralph Lauren onesies.  All shades of pink and so comfortable.  I just love them.

I also brought the second AMH voile receiving blanket which I have already posted about sitting here on top of the left bucket.  I mailed one earlier when the shower was cancelled.

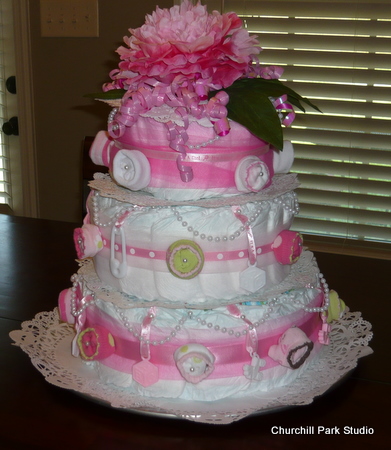
This last gift/shower picture I will share is the first diaper cake I have made in 25 years!!  I was glad that I remembered a few things.  For this one I used a pizza pan as the base with a wooden dowel going through the center for support.  I made it with size 1 diapers so that Kim could have it around for a while and not feel as if she needed to be using the diapers.  I also came across file folder sized rubber bands at the Wal-Mart and they were perfect for keeping the diapers together.  Perhaps you can see them through the tulle and ribbon???   Another tip I received from a colleague at school was the use of paper doilies between each layer.  We had tons of rattles and toys to use as decoration…but in the end I preferred the little socks twisted like flowers.I foraged into Kim’s sewing supplies (with her mom’s permission ; )) and found some corsage pins which were perfect for securing the socks.

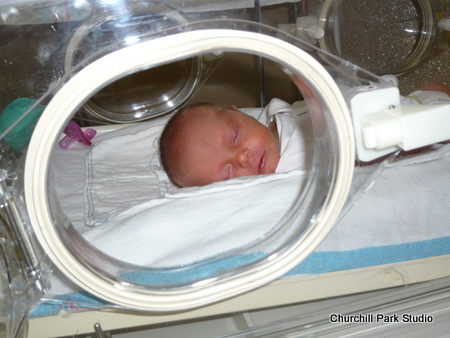
The theme for Kim’s shower was { Pink, Pearly and all things Girly}.  I think that sums up the cake as well!    But the best part of everything is this little bundle of joy in her little house.  I can’t wait for her to be just a wee bit bigger and stronger.

I have another gift just about finished and ready to send. I will put it in the next post.
Thanks for visiting,
Read Full Post »

Been sorta busy with the end of school, but I finally charged up the camera battery and wanted to share a couple of my gifts that I brought with me when we visited D.J. and Kim in GA.
Here is a picture of the nursing cover for Kim. I used a print I know she likes along  with a small amount of coordinating fabric. I lined it with Kona white and if you look closely you will see that I made a pocket with cotton chenille for a small container of cream or perhaps a pacifier. The chenille can also be used for wiping a cute little mouth ; )  I also switched up the pattern a bit and rounded the corners at the bottom.  I am happy with the results and the hospital nurses were very complimentary according to our new mom.

Thanks for visiting,
Read Full Post »

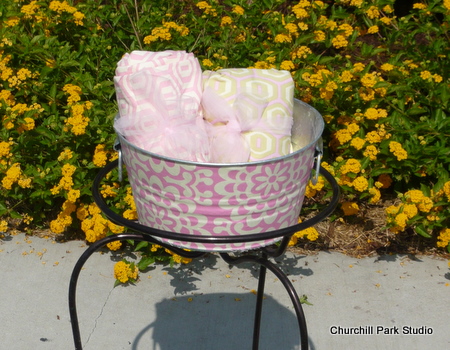
My dil was supposed to have her baby shower today, but it had to be cancelled.  I was so sad for her, she was going to travel home to NC from GA to see all of her high school and college friends and celebrate her first baby.  I sent her a package with a few of the gifts I had planned for the shower.  It is supposed to arrive today.  One of the gifts is a receiving blanket I made using the Anna Maria Horner voile.  Everyone always talks about how buttery soft this fabric is-and they are right.  It feels like silk.  I understand now why there were so many scarves made with it.  Well, I wanted to make something that the baby would use right away with this wonderful fabric.  I chose to make a couple of receiving blankets with the voile on one side and AMH Folksy Flannel on the other.  I didn’t want to make the blanket too complicated, so I used large pieces from several of the prints.  I made them approximately 36 ” by 36″ and rounded the corners.  I finished them with a top stitch around the edge and did not do anything to the center (such as any type of quilting).

Here they are:

I also sent along this dining chair cover made with some Sandi Henderson Ginger Blossom from this post.  Along with some burpies from this post and a couple of store bought items.  I hope this will perk up the new mom to be and hopefully she will look forward to the shower she will be having in GA in mid-May. 

Thanks for visiting,
Read Full Post »

I have just returned from a quick trip to NY where I zoomed up there from NC to attend a shower for my niece.  Jessica is due towards the end of May and does not even look 5 months along!  That never happened to me!

Well, the two-soon to be grannies threw a wonderful Sunday afternoon shower and I was very happy that I could attend.  Our Prom was on Friday night and because my home room students are Juniors, one of my responsibilities is to help with the Prom (Juniors host the prom for Seniors at our school).  My school system always holds their Prom the night before we let out for Spring Break.   So, Friday night I arrived home really late and left on Saturday during the storms for NY.  I made it somewhere north of Baltimore and stayed for the night.  Up early on Sunday and made it just in time to fluff the tissue paper on my gift bags, take pictures in the Michael’s parking lot (where I bought the tissue paper) and zoom to the restaurant.  I have to say that I had forgotten how beautiful the landscape is in upstate NY.  The Catskill Mountains are truly gorgeous.  

Well, these are not the best of pictures, but they are all I have so these will have to do.   

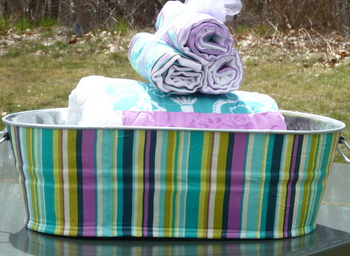
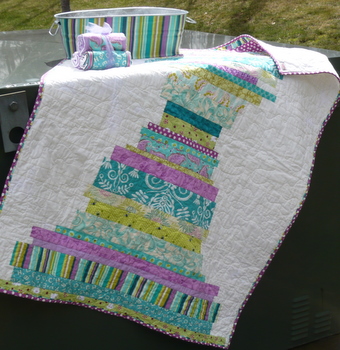
I saw some of these galvanized tubs online used as props for baby pictures and thought they were so cute.  I will say that it was a little more challenging to decoupage than I thought it would be.  I have a few air bubbles that showed up a couple of days after I thought the tub was dry and complete, but I still think it is a great way to package everything and would still look good in a photo.

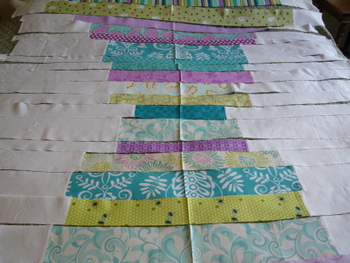
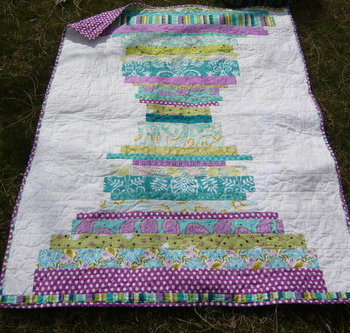
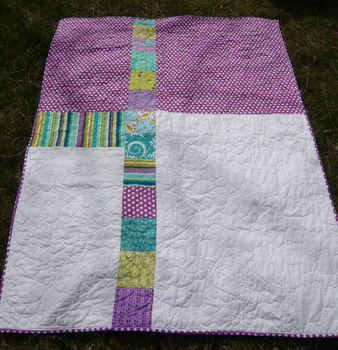
Here is a picture of the assembly.  I tried to have a good blend of  thick and thin strips and to distribute the colors evenly.  I pressed the exact center of each strip so that I could have each section evenly distributed.  I wanted to make sure it could look like the letter { I } once it was complete.  I also tried a new machine binding technique that I will share in an upcoming post.  It is a fusible, flange machine binding that works so well!  You will love it!-promise ; )

Thanks for visiting,
Read Full Post »

I wanted to share my most recent swap with you.  I was fortunate enough to make it through the lottery for the Doll Quilt Swap #10.  Thus far, I have participated in # 9 & 10.   This is a big swap on flickr.  These quilters take their doll quilts and their swapping seriously.  The talent and creativity are unbelievable. 

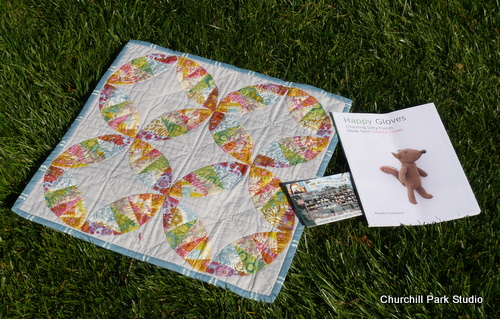
I received this awesome quilt from Handmade retro all the way from Australia.  Everything about it is hand done.  After receiving it, I went and visited her blog to read about it.  It is so much more beautiful in person.  I am a big fan of Anna Maria Horner and mentioned it in the initial questionnaire.  Both sides of this quilt are equally fabulous…I really love it.  Can’t wait to hang it in my studio.  Knowing that I am busy making things for the girls, she also sent along this super cute book with all kinds of stuffed creatures.  There were also some buttons, but I had already stashed them by the time the sun can out.  Thanks retromama!

As for the quilt I made…I really have to push myself  in this swap.  Not only are the people talented, but they are always online commenting, joking and exchanging ideas.  I had been stuck on a specific idea for round ten which revolved around my cake plate from Christmas.  I tried-twice, to get an appliqué to come out like the design on my cake plate…but no go. 

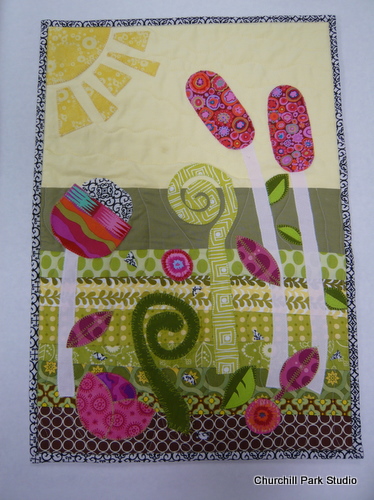
The strands I wanted were too thin and it was just too difficult for me to accomplish the task.  Perhaps a master appliquest (is that a word??) could have been successful.  Anyhoo…I have this book called Pretty Little Mini Quilts from Lark Books and as I thought about my partner, who lives on a large piece of property in a place much colder than NC…I made the decision to do a  version of a quilt about Spring from the book.   This was my first time using the blanket stitch on my Bernie 820.  I really liked the stitch, but I need to work a bit more on the curves and knotting at the start and finish.  I thought I was using the feature on the machine, but it seemed like a few were not as secure as I wanted.  Will have to work on that (note to self).  Here are some pics. 

One of the requirements is to label your quilt.  So I used the lettering capability on my new machine.  This is something I hadn’t done before and it was easier than I thought.  I placed one of my new small labels under my name.  Another aspect to virtual swapping is extra goodies in the package.  I like to include things that I see either out shopping or things I have around the studio which remind me of the partner I have been stalking.  This partner is a quilter as well as a knitter.  The fat quarters and scraps will be so perfect for her (can’t say more until she gets her package).  I haven’t knitted in quite a while and I have – too much yarn, so I thought I would share some.  : )  Hope she likes it!

Thanks for visiting,
Read Full Post »

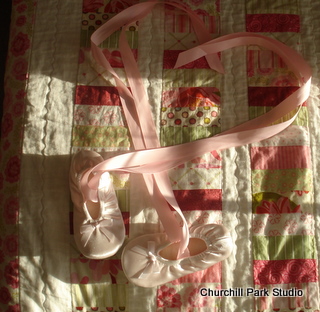
What does a Nana do, when the granddaughter wants some ballet slippers and you can’t find them in her size.   These little slippers were the best I could do (Dansk at Wal-Mart), but Kate said they didn’t look like real ballet shoes, she needed the ribbon so they would tie up her leg!  A little ribbon and 5 minutes on the sewing machine … Voila!  Kate is really happy with her shoes.  My daughter took a few pictures of them for me to post.   The quilt I made for Kate is on the bed.  Lots of pink, red and green! 

Thanks for visiting,
Read Full Post »

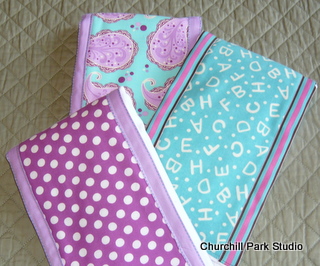
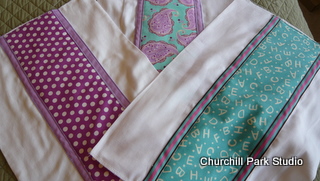
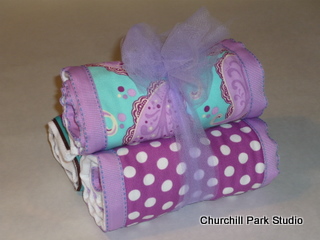
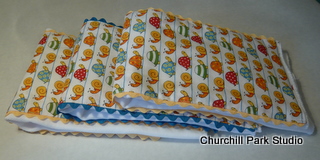
I worked on my matching burpies and except for some monogrammed initials or names, which I am going to attempt with my new Bernina 820, these are finished.  I like to make them in sets of three…not sure why.  Maybe it is because that is how I often see them in boutiques and specialty stores.  My niece Jessica is due in May.  She loves the colors purple and turquoise and those are the colors my sister said to choose. 

I like to roll them and present them to the new mom looking like this.  Isn’t that pretty?

Someone will be getting this set with Farmer’s Market and a little AB  that is waiting to be monogrammed.

I have made enough burpies to know that you can get three from one fat quarter, but you are left a little short on the end.  I used to run them through my serger and just make them 1 1/2 to 2 inches shorter.  But this time I am going to try the embroidery on my new machine.  Hope it works.  I am a little reluctant because I normally buy the premium Gerber diapers and they are pretty thick.  I like the thickness for padding a baby’s head, but not sure it will work for the embroidery.

My daughter-in-law, Kim is a huge Amy Butler fan.  I think you will be able to tell which girl is getting which sets of burpies.  The third one is not finished because I ran out of the pink rick-rack. 

My nephew is having a boy in late June.  I am planning to use my Pure for that quilt, but in the mean time I made a few burpies with snails  for his new boy.  They are going to name him Keegan (hope I spelled that correctly).   I will let you all know if I am able to figure out the embroidery on my machine and show you the results.

 I made these so that the snails are right side-up when they are over a mom or dad’s shoulder and the name will show on the back side. 

<< Snakes and snails and puppy dog tails-that’s what little boys are made of >>

Thanks for visiting,

Read Full Post »

In honor of my 100th post, I am having a giveaway. 

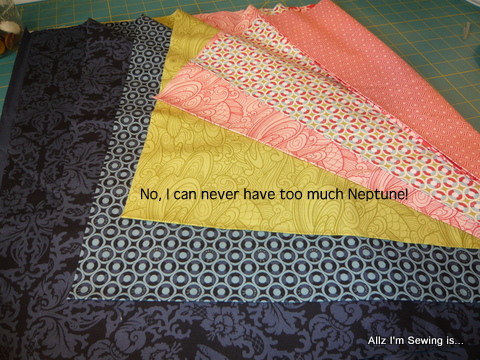
I am actually ready to part with some of my Neptune by Tula Pink.  One jelly roll of all the prints can be yours!!!

Here is all you need to do:

You can do one, two or all three things ; )  

1. Leave a comment and tell me something you would like to make with a Neptune jelly roll. 

2. Sign up as a follower via email subscription or to the feed.

3. Link the giveaway to your blog.

Be sure to leave separate comments to increase your opportunities with the random generator.  I will choose a winner on Monday March 21st.

Don’t forget to leave contact information within your comment.

Thanks for visiting,

Read Full Post »

Older Posts »